|
|
Post by Whiskers on Apr 30, 2007 23:09:33 GMT -6
I came across another 209 today and the drag was weak so I decided to tear
it down and put a set of drag washers in it.You will notice in the pictures the old drag washers was in bad shape.
I figured while I was at it I would take a few pictures and
post them so that it might help someone else wanting to
do it.I'm not very good at explaining things so bear with me.
This is the stock 3 fiber washer set-up that comes in the reel
and not the teflon "smoothie" set you can buy.
So here it goes,there is several pictures so I will post them
one at a time.
|
|
|
|
Post by Whiskers on Apr 30, 2007 23:13:02 GMT -6
I will be taking apart the sidecover with the reel crank so that is the only side you need to remove screws from. Step 1: Remove the frame post screws (2 of them) Step 2:Remove the slotted post screw Step 3: Remove the stand screws (2) 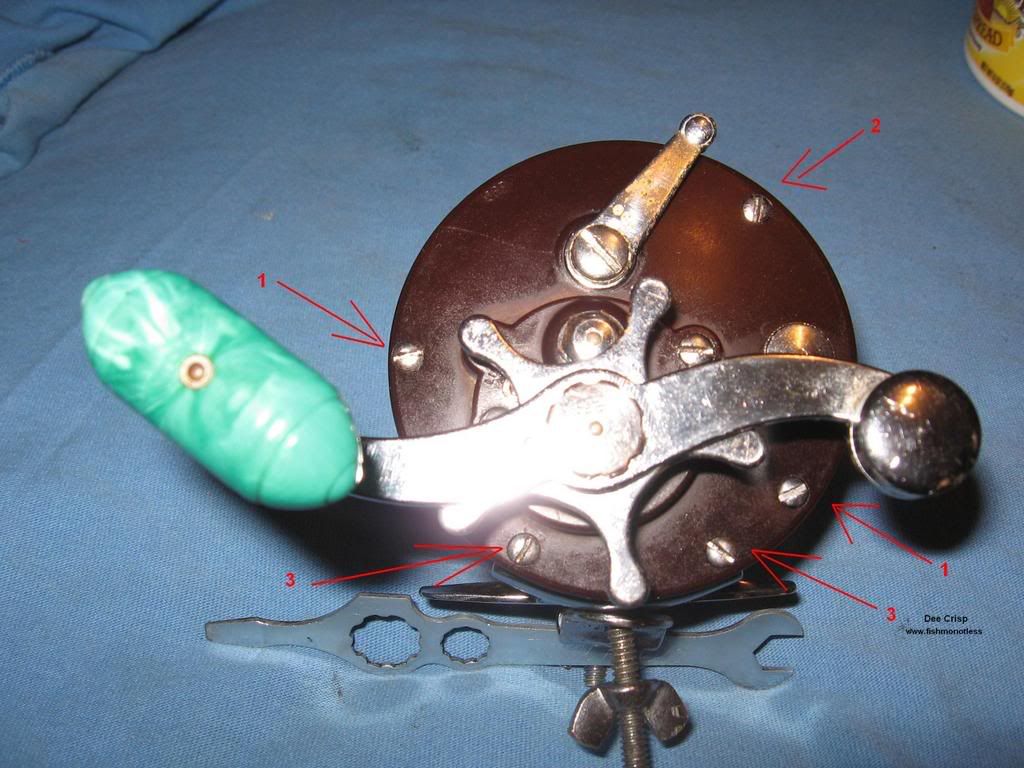 |
|
|
|
Post by Whiskers on Apr 30, 2007 23:14:01 GMT -6
Step 4: Pull the cover off.Then remove the worm bearing and spring,It will make it easier when you put it back together but it's not necessary. step 5: Remove the handle and star.  |
|
|
|
Post by Whiskers on Apr 30, 2007 23:14:44 GMT -6
Step 6: Turn it over and place your thumb firmly on the bridge assembly so you can remove the 4 screws on the other side. You want to be careful so you don't lose the dog or spring when it comes apart.The dog and spring is right under the screw #6 is pointing at  |
|
|
|
Post by Whiskers on Apr 30, 2007 23:15:41 GMT -6
Step 7: Don't get your bridge screws mixed up you will notice the upper ones are only threaded at the tip. After you get the bridge screws out gently pull the bridge out and you will see the dog and dog spring. Pull the dog out from where #7 is pointing unless grease has it glued to the bridge. 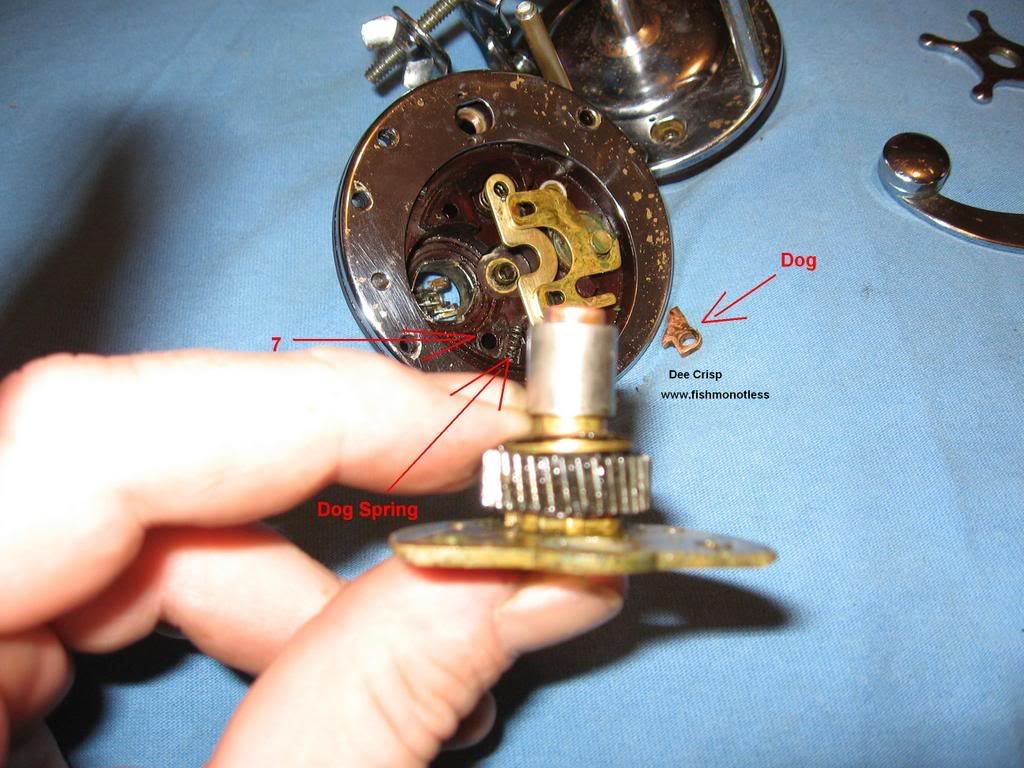 |
|
|
|
Post by Whiskers on Apr 30, 2007 23:16:25 GMT -6
Step 8: Remove the spacing sleeve,tension washer,and the first metal drag washer.Make sure to lay these out in order as you take them off,it will be alot easier putting it back together that way.You will notice the first metal drag washer has two flat sides on the inside.You can also see these drag washers were crumbling apart.Go ahead and remove the rest of the washers.You can look at step 10 for the names and descriptions of the washers.  |
|
|
|
Post by Whiskers on Apr 30, 2007 23:17:08 GMT -6
step 9: After you clean everything up you are ready to put it back together. Start with the fiber washer that goes UNDER the main gear. 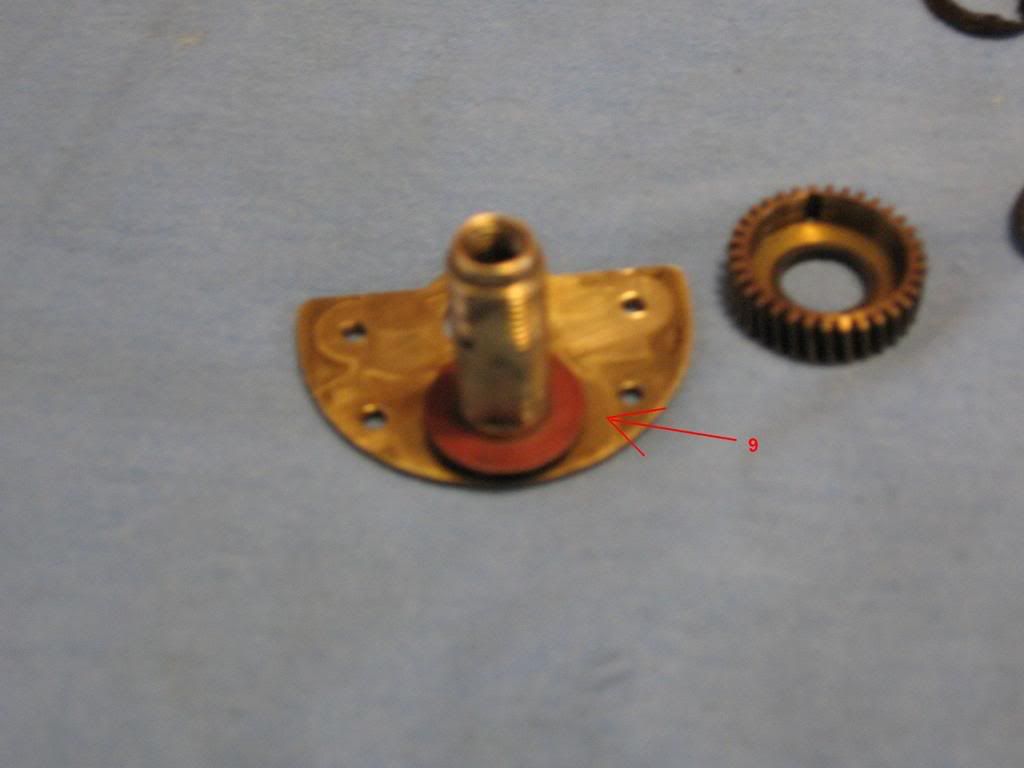 |
|
|
|
Post by Whiskers on Apr 30, 2007 23:17:48 GMT -6
Step 10: You can see the new set of drag washers on the bottom row and the old set on the top. I am installing new metal washers too (just because I had them). I also had another main gear,so there is a second one in the picture toward the top.In case your wondering why you only had one in yours.  I have them laid out in the order to go back on the gear sleeve ( # 10 attached to the bridge). A: The fiber washer that goes under the main gear. B: Main gear goes next on the shaft. C: New drag washer D: Metal washer with 2 flat sides (on the inside). E: New drag washer F: Metel washer with 2 dog ears on the outside. G New drag washer H: Metal washer with 2 flat insides i: Tension washer J: Spacer sleeve 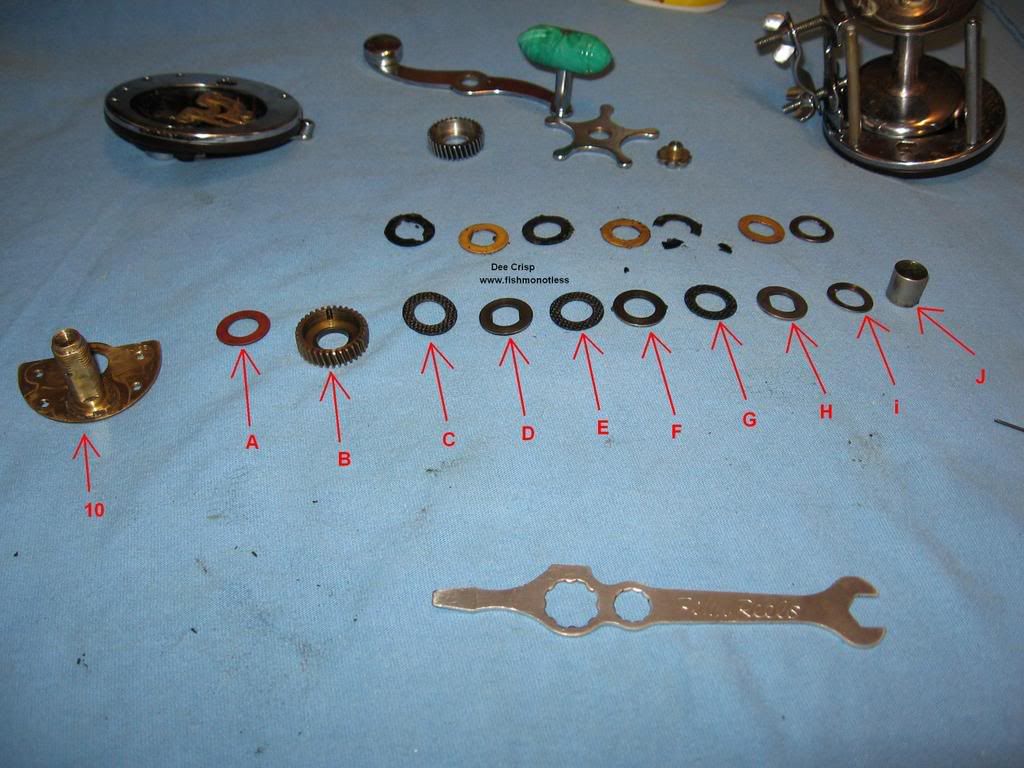 |
|
|
|
Post by Whiskers on Apr 30, 2007 23:18:37 GMT -6
Step 11: I skipped this picture it was the same as #9 so it wasn't really needed. Step 12: Place the lower bridge screw back in the hole and put the dog on it. Note the cut-out in the dog where the spring goes,add the spring. You will have to hold the screw in place on the outside with your fingers. 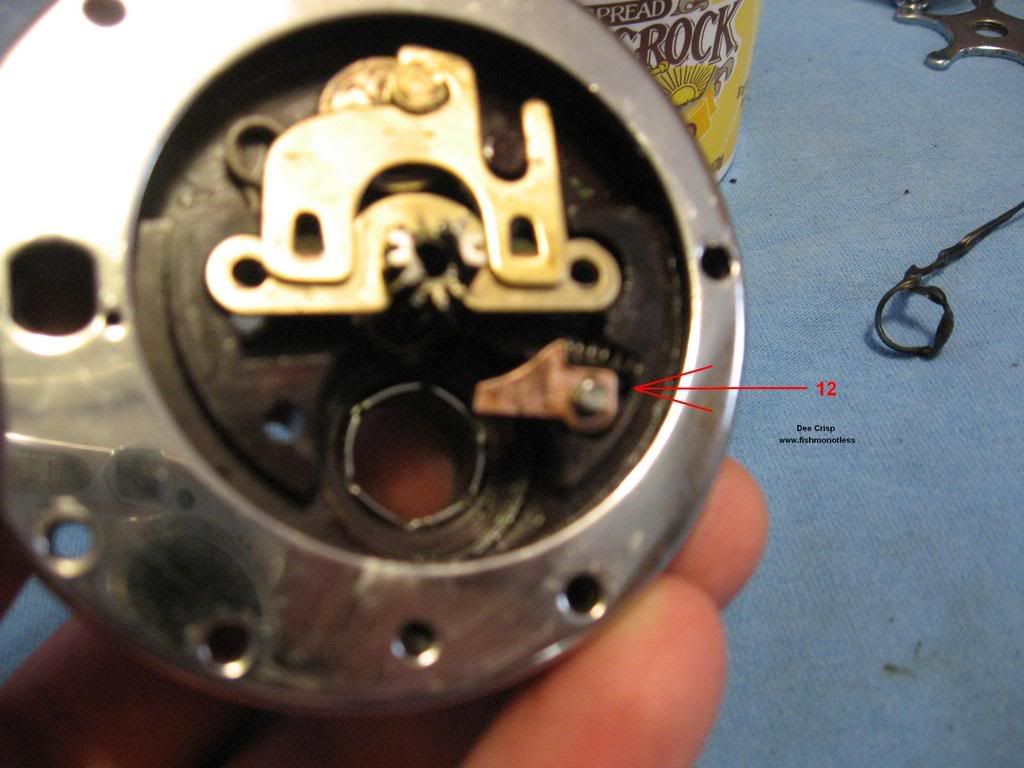 |
|
|
|
Post by Whiskers on Apr 30, 2007 23:22:07 GMT -6
13: you will have to be careful and putting the bridge,and drag assembly back in so the drags don't slip out of the gear(invert it slightly helps). Turn the bridge slightly counter clockwise so you can get to the dog and spring. This is the part alot of people have trouble with but it isn't too bad doing it like this. Take a small screw driver or something similar and compress the spring and put the dog in place on the gear. 14: Turn it clockwise while pressing down with your thumb on the bridge to keep it in place. It should go right into place with the pinion gear slipping right into the round hole in the bridge. while still holding down with your thumb put the bridge screws in place, remember the two that are threaded only at the tip go in the top through the clutch springs. Now put it back together in the reverse order the reel came apart.  |
|
|
|
Post by Whiskers on Apr 30, 2007 23:23:20 GMT -6
Now you are ready to sit back and admire the job you done.I didn't mention lubing it up with the oil and grease but I'm sure you have that covered.It only takes a tiny amount of each to make it work smooth as the day it was new. I replaced the chrome on this one while I had it down,I had a parts reel here that had better chrome on it and a spool I had already loaded with line. 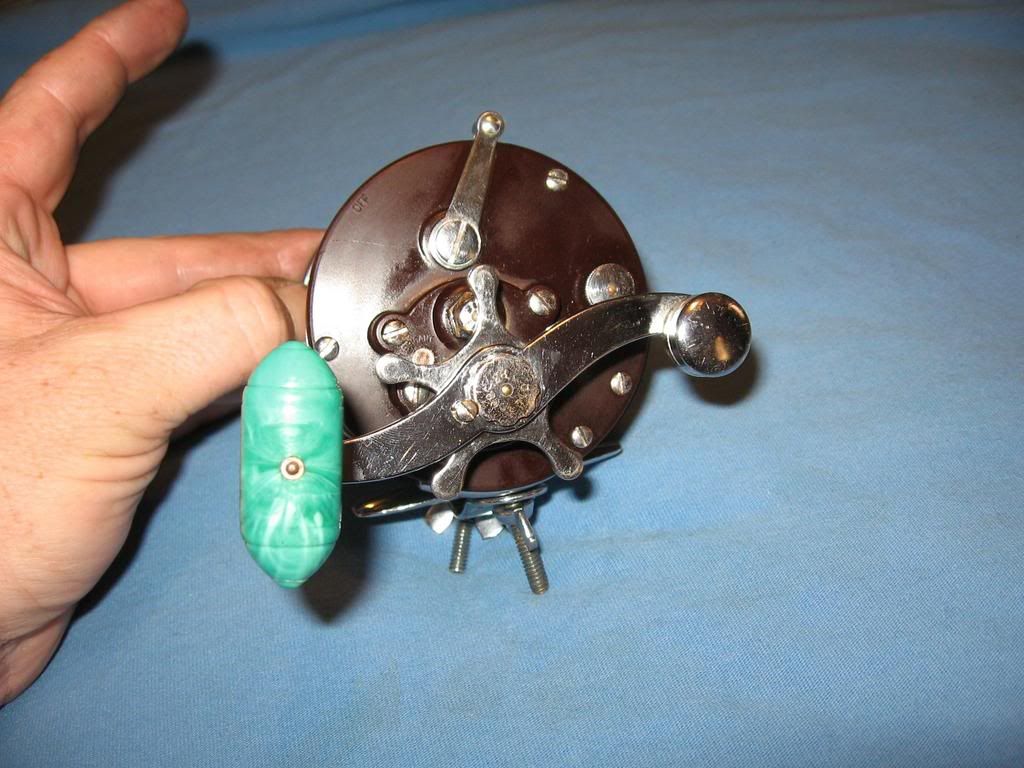 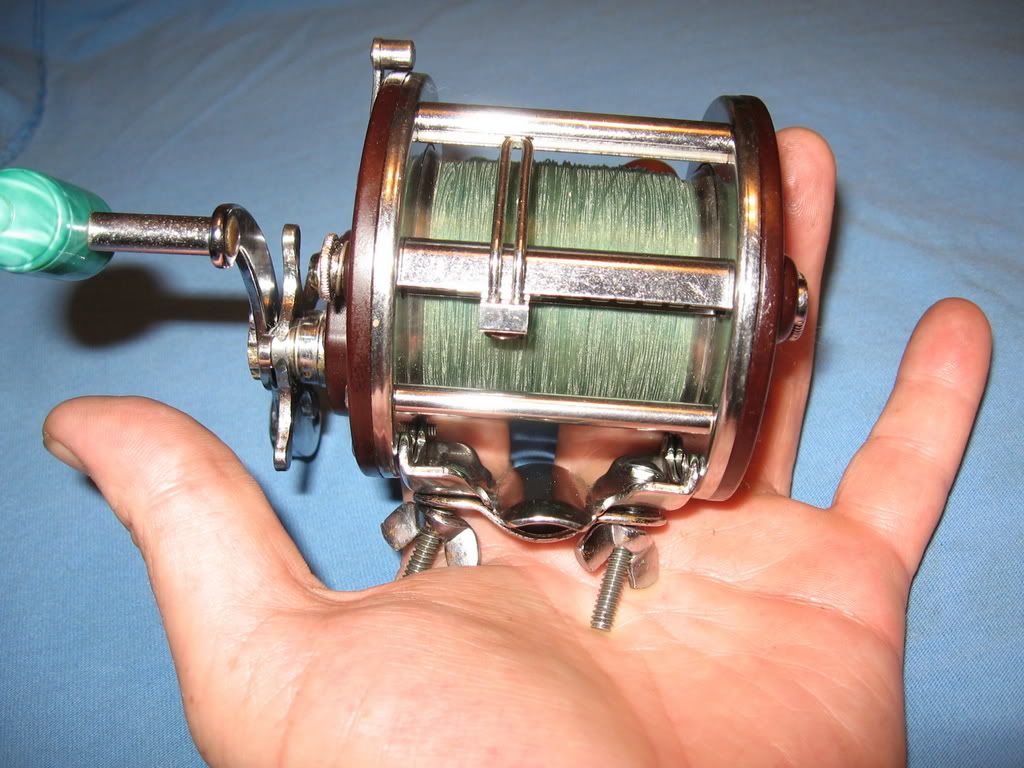 |
|


